
This post contains affiliate links. Please see our disclosure policy.
Crispy, olive oil-fried crust. Pillowy, open crumb. No stand mixer required.
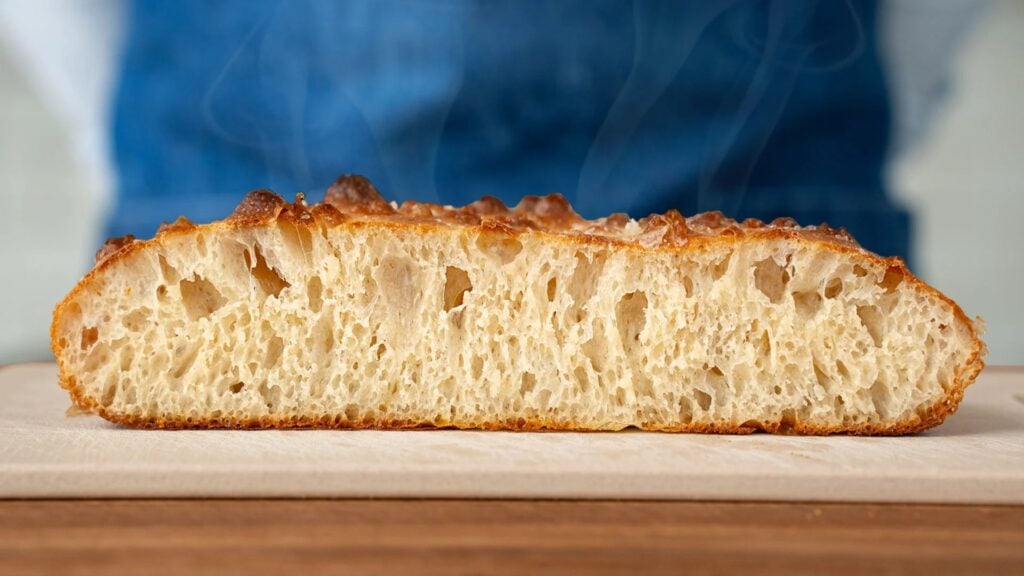
Table of Contents
Why This Focaccia Recipe Delivers
Focaccia is possibly the EASIEST bread you can make at home. It requires no stand mixer, no special equipment, and ZERO previous bread baking experience. Also, easy does NOT mean compromise on quality here. The unique form factor you get from the cast iron gives you textures AND flavors not possible with the more traditional sheet tray while simultaneously making the process easier to pull off thanks to the high sides and incredible heat transfer.
Brian’s Pro Tips
Cast Iron — Super-hot cast iron + plenty of olive oil fries the bottom crust, creating a deeply golden, shatteringly crispy edge you simply can’t get from a sheet pan. Plus the high sides allow for much higher proofing.
Cold Ferment — Resting the dough in the fridge overnight slows fermentation, building extra strength so this very wet dough can hold its shape during proofing and baking. Just as importantly, the cold ferment develops deeper flavors (nutty, yeasty, and lightly sweet) that you won’t get from a quick room-temperature rise.
Autolyse — Letting flour and water hydrate before adding salt and yeast builds a more extensible gluten network, leading to bigger holes, more gluten development, and a lighter, more tender crumb.
Folds — Two simple strength-building folds replace kneading. This technique is essential for giving this super wet dough enough structure to trap big air bubbles and hold itself together when gassy and proofed high in the pan.
High Heat — A full 500°F bake delivers instant oven spring, rapid crust formation, and a deep golden brown crust with seriously savory fried edges that taste like a donut, or funnel cake. Don’t be shy on the heat, and BAKE IT DARK!
Key Ingredient Notes & Substitutions
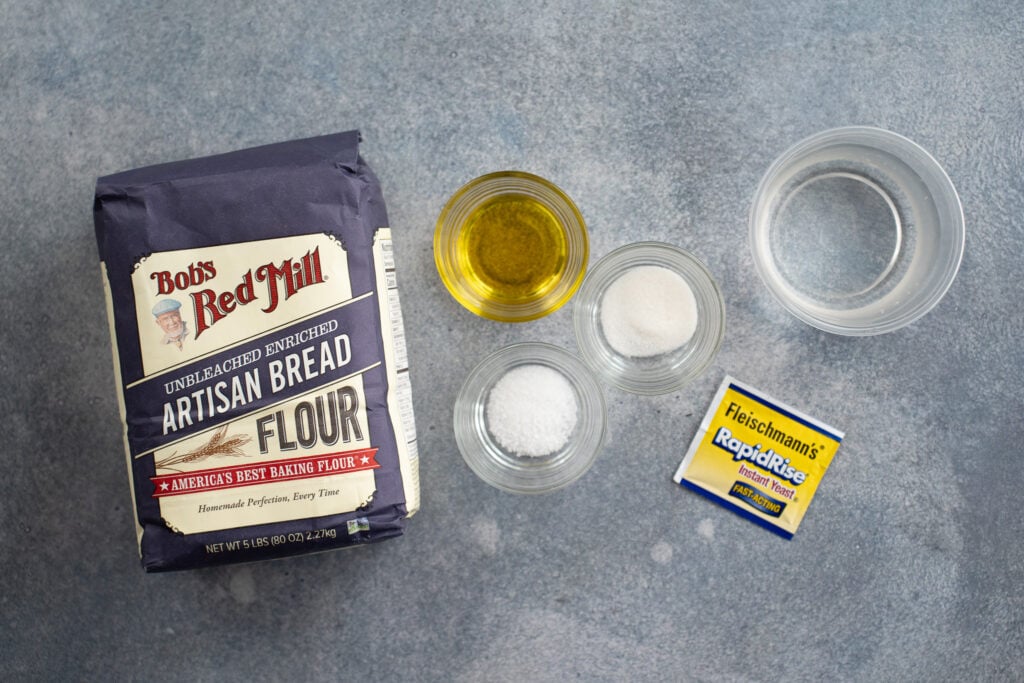
See the recipe card below for full list of ingredients and measurements.
Bread Flour (12.7% protein)
Bread flour’s higher protein content is necessary to build a strong enough gluten network to hold up this wet dough while proofing. It also enables you to get those signature giant air pockets focaccia is known for. All purpose flour can work, but adjust your expectations for crumb hole size. Leave out 40g of water as well. AP Flour is much less absorbent than bread flour.
Olive Oil
Do not be shy on the EVOO. You need a pool of oil in that cast iron. Roughly a quarter cup in the pan, plus more drizzled on top before baking. This isn’t about preventing sticking. The oil is an ingredient. It fries the crust, flavors the bread, and creates that signature focaccia texture.
Water Temperature (90°F / 31°C)
Measuring the water temperature ensures that your dough at home ferments at the same rate as mine in this recipe. Water that’s TOO hot will potentially damage the yeast and water that’s too cold will stall fermentation and you’ll be waiting forever for something to happen. Please don’t skip this! Water temp is a huge factor in quality of the outcome, you guys.
Flaky Salt (for finishing)
Regular table salt disappears into the dough. When I say “flaky salt” I mean salt that is dried into very large crystals that are usually at least ¼” wide. This salt delivers little bursts of salinity with every bite and it brings a ton of excitement and contrast. I typically use Maldon brand, but use whatever you like.
How to Make Cast Iron Focaccia
Below, you’ll find the detailed, step-by-step instructions with photos and lots of tips. For a more condensed version of the recipe, check the recipe card below.
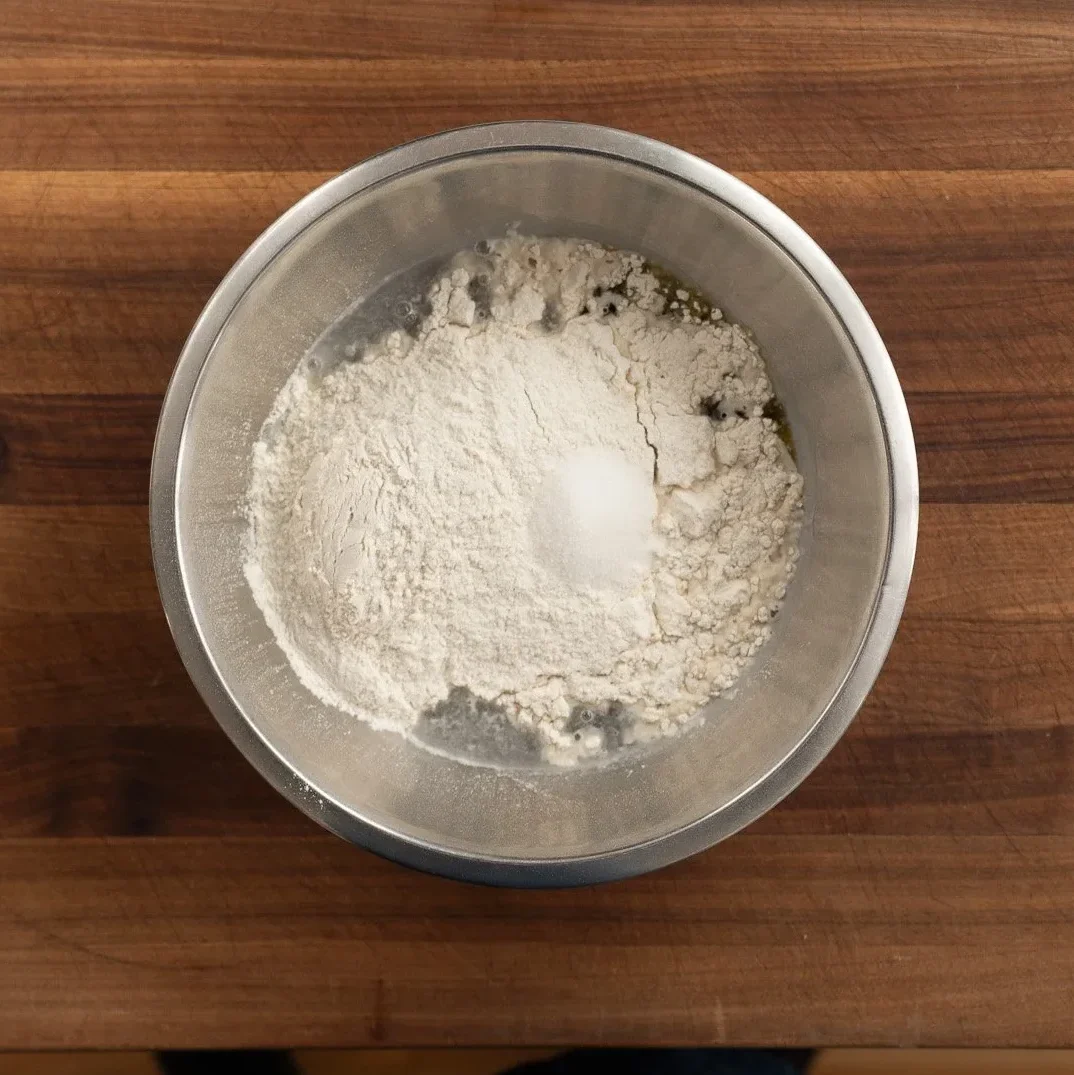
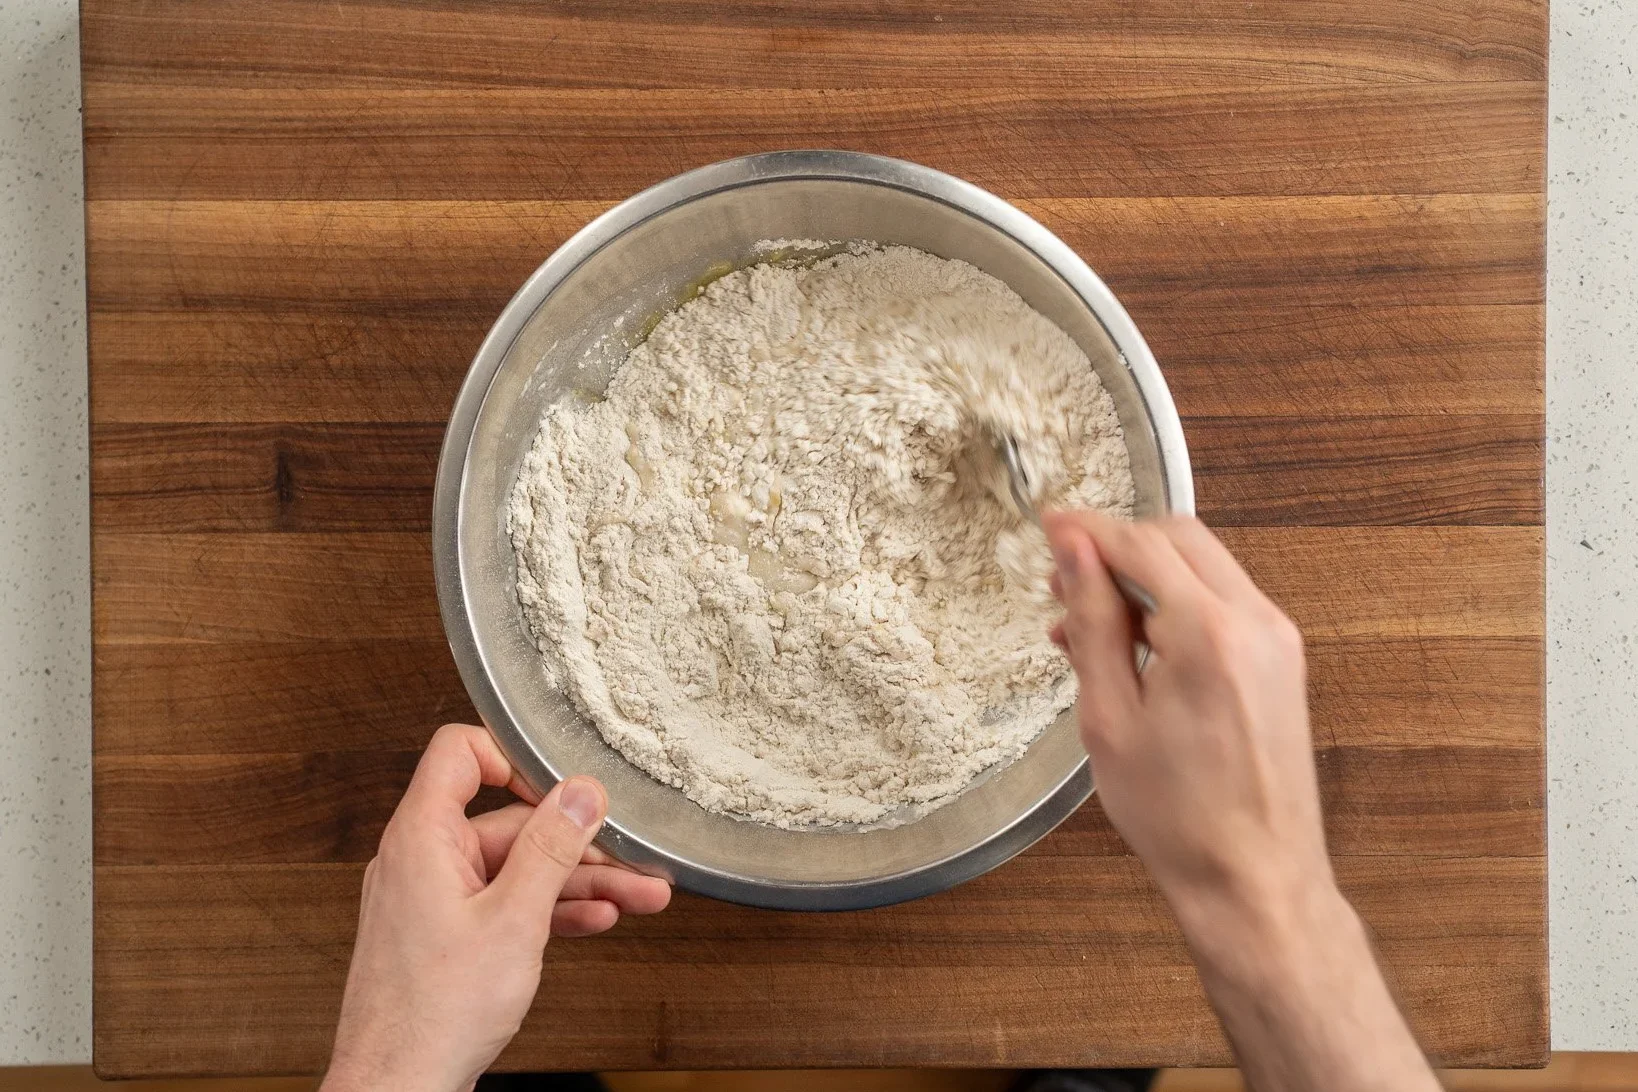
1. Measure 360g warm water, sugar, olive oil, and bread flour into a medium bowl. Stir with a sturdy metal spoon until combined, then finish mixing with a wet hand. Cover and rest for 30 minutes.
This is your autolyse — it lets the flour fully hydrate before adding salt and yeast.
2. After 30 minutes, combine 20g warm water, yeast, and salt in a small container and mix to combine
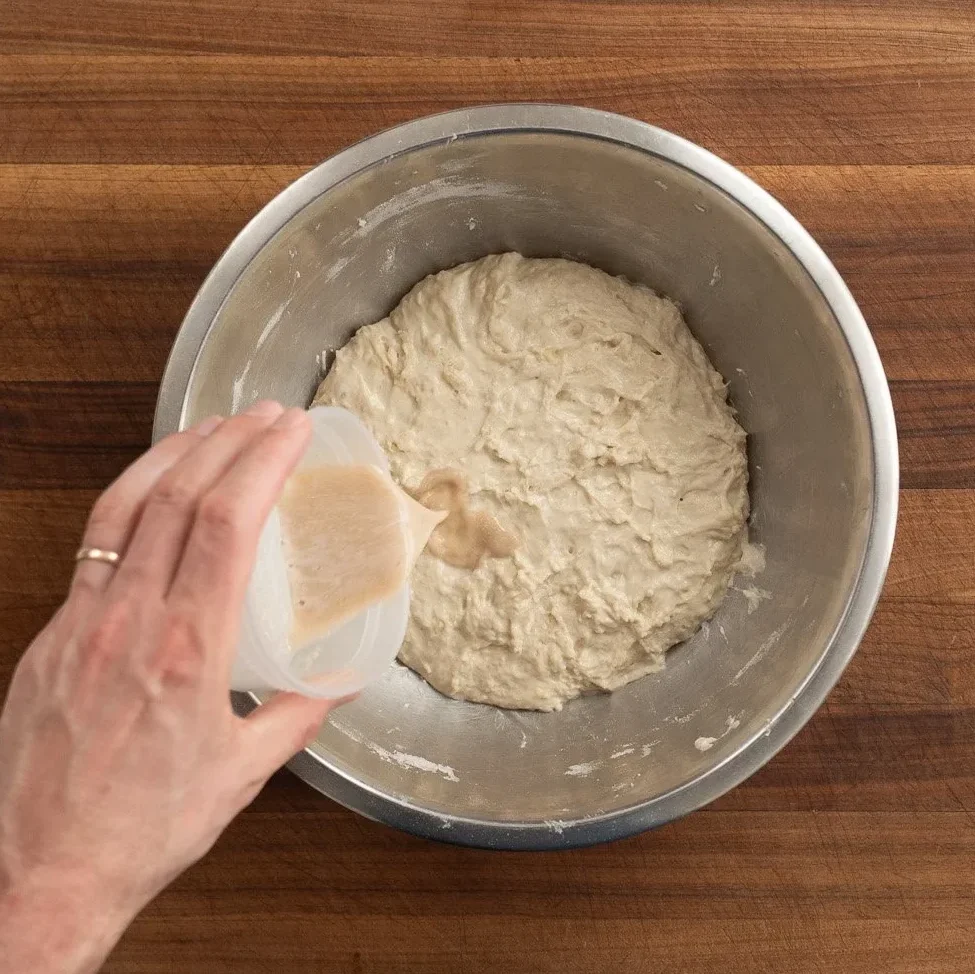
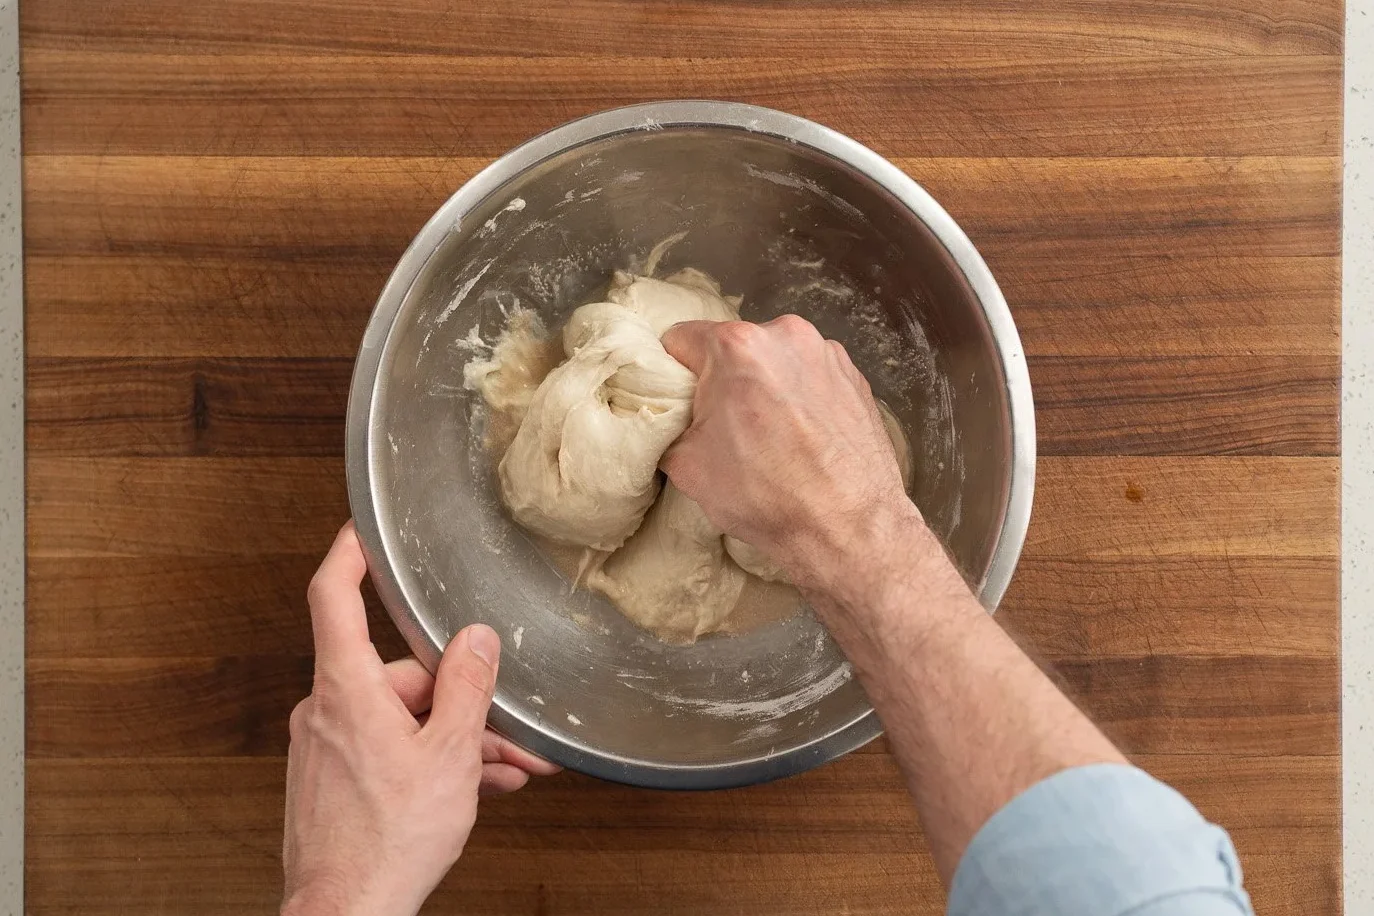
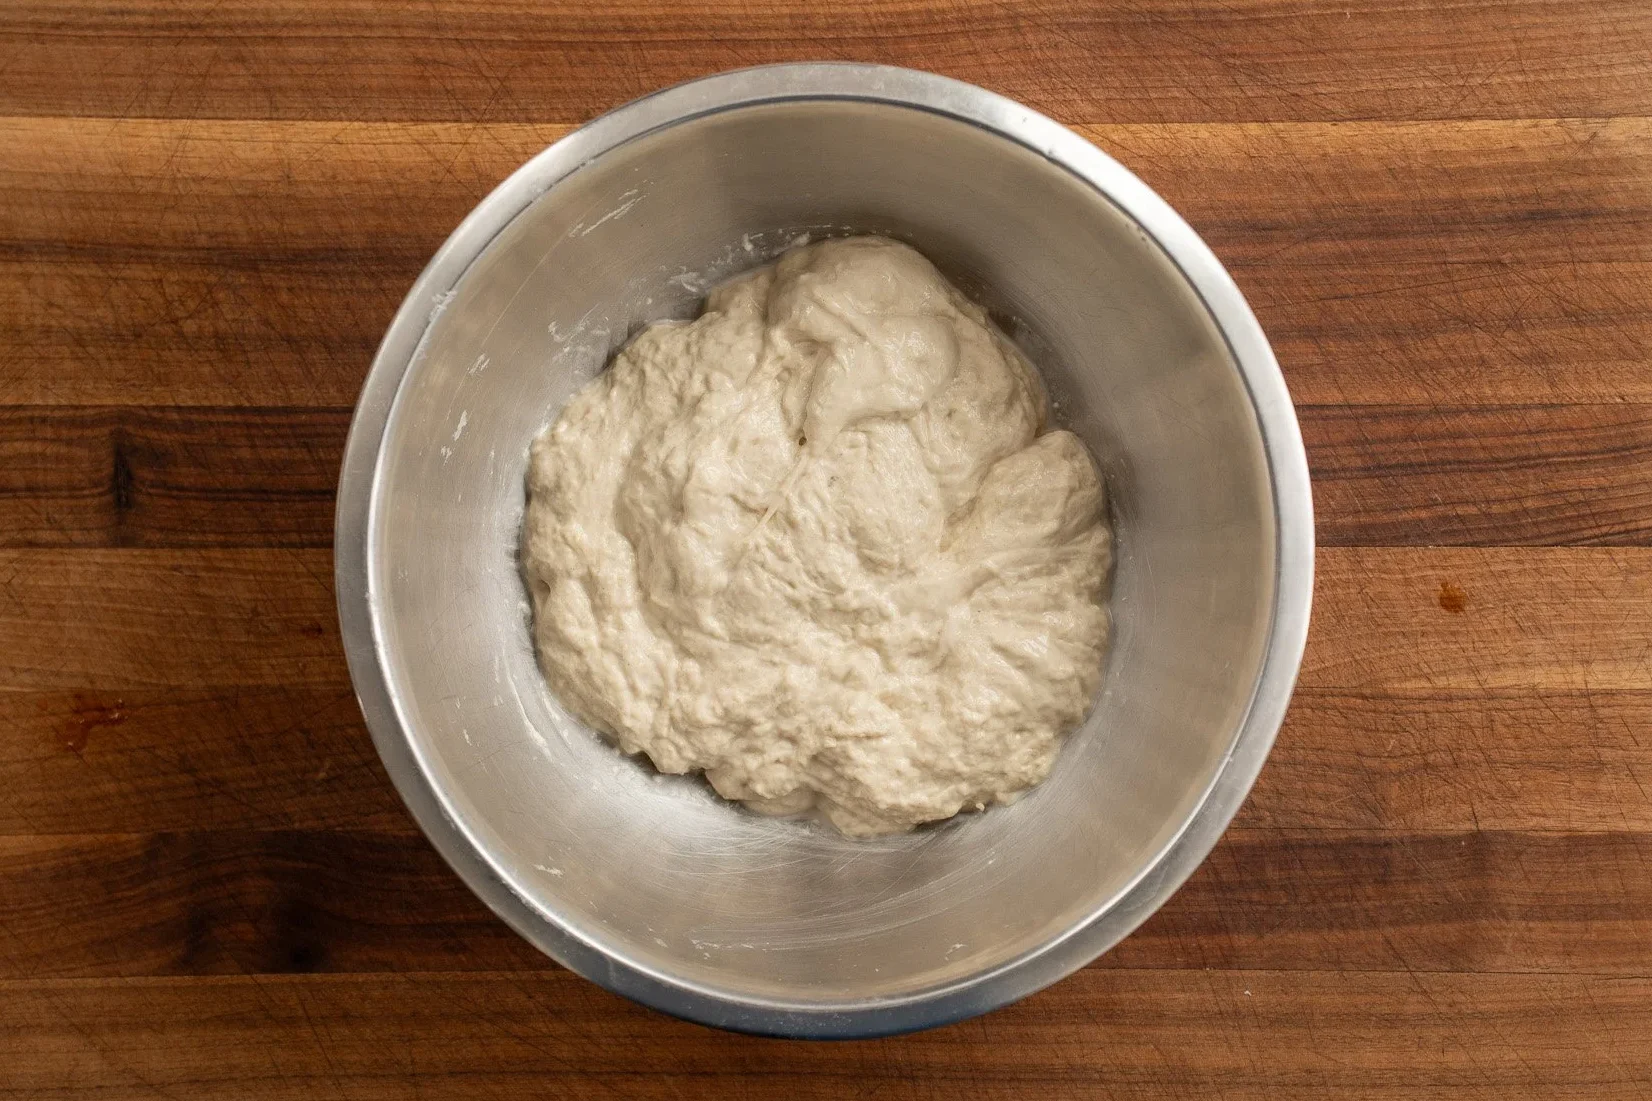
3. Once you have a yeast-salt slurry, add to the dough then wet your hand and use it to mix the dough until the salt and yeast are relatively well combined with the hydrated flour. This should take about 60 seconds. My preferred move for combining things here is to use a claw like squeeze. At this point the dough will be super shaggy and sloppy and that’s totally ok as long as there are no large clumps. If there are, continue working those out by hand.
4. Cover and ferment at room temperature for 30 minutes.
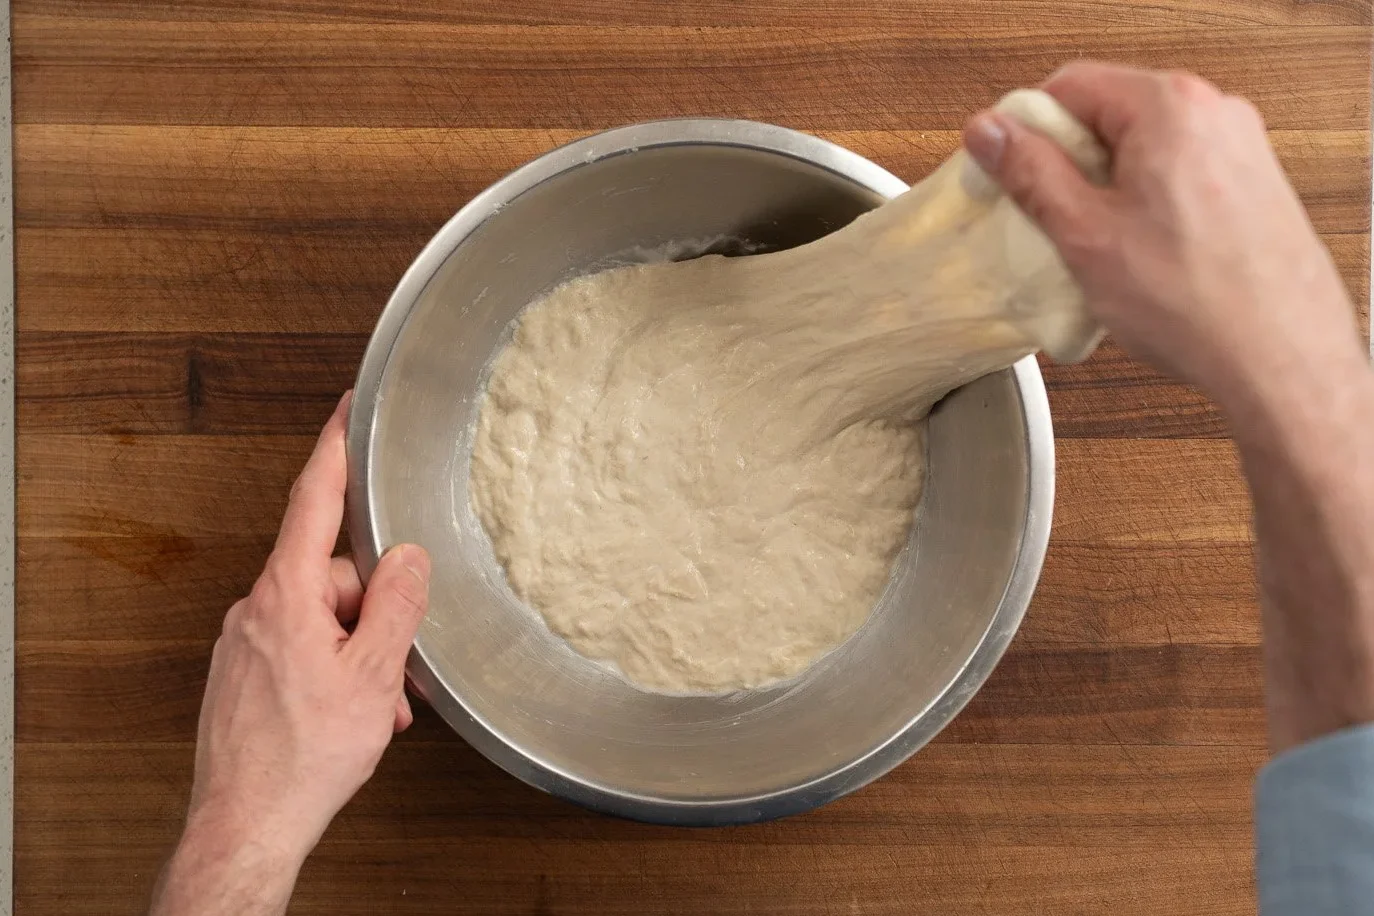
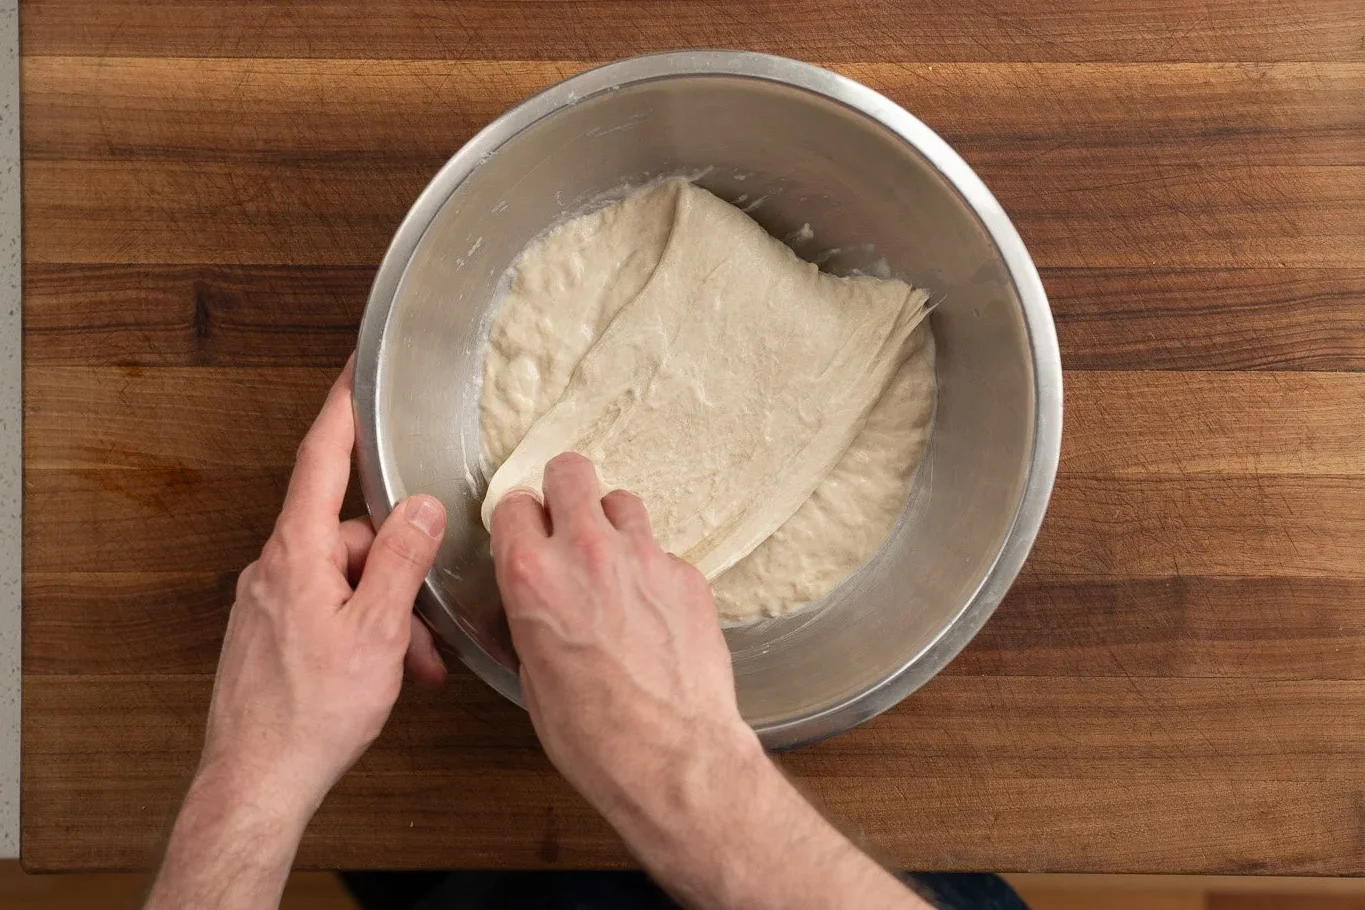
5. 30 minutes later, Perform a strength-building fold. To do that, grab a section on one side of the dough and stretch it up until you meet resistance. Fold that stretched portion of dough across to the other side of the bowl.
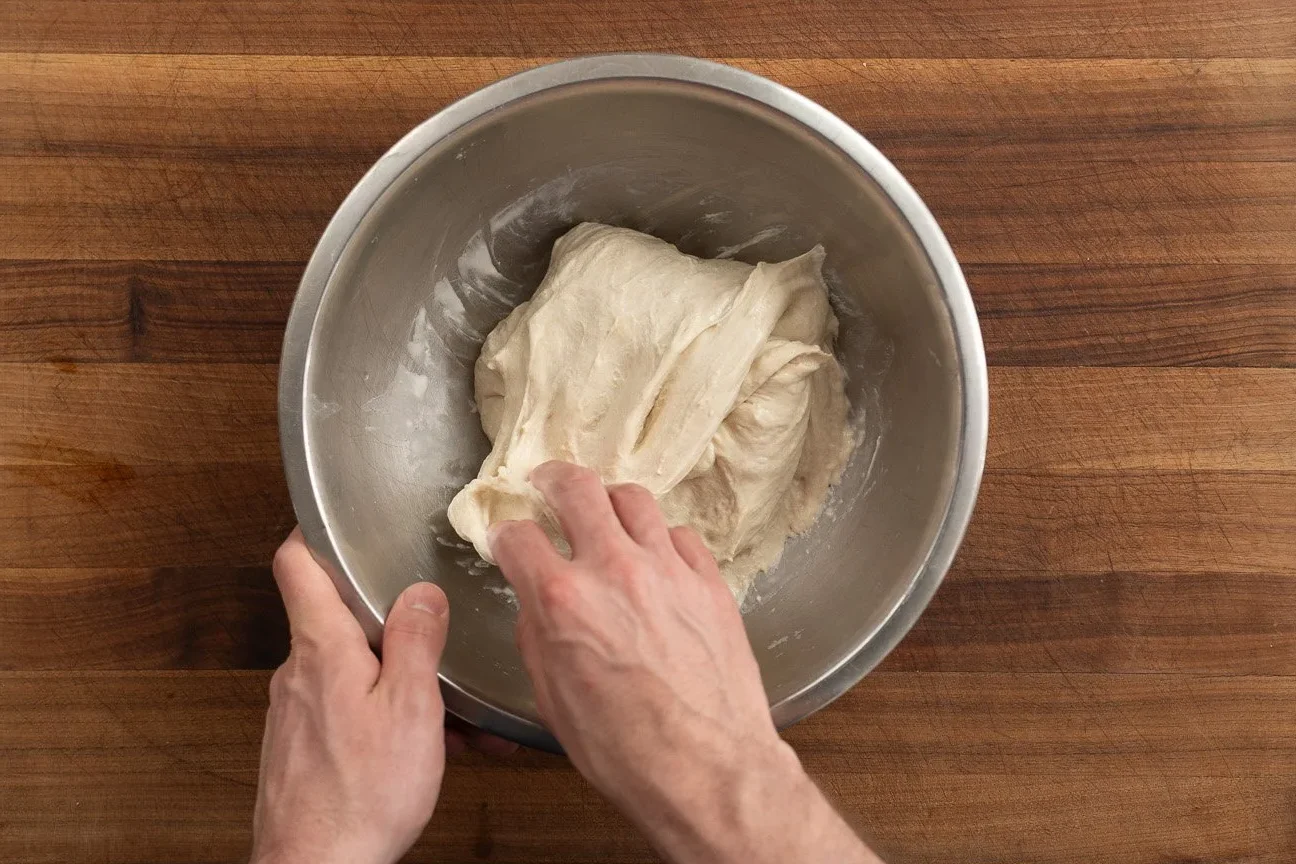
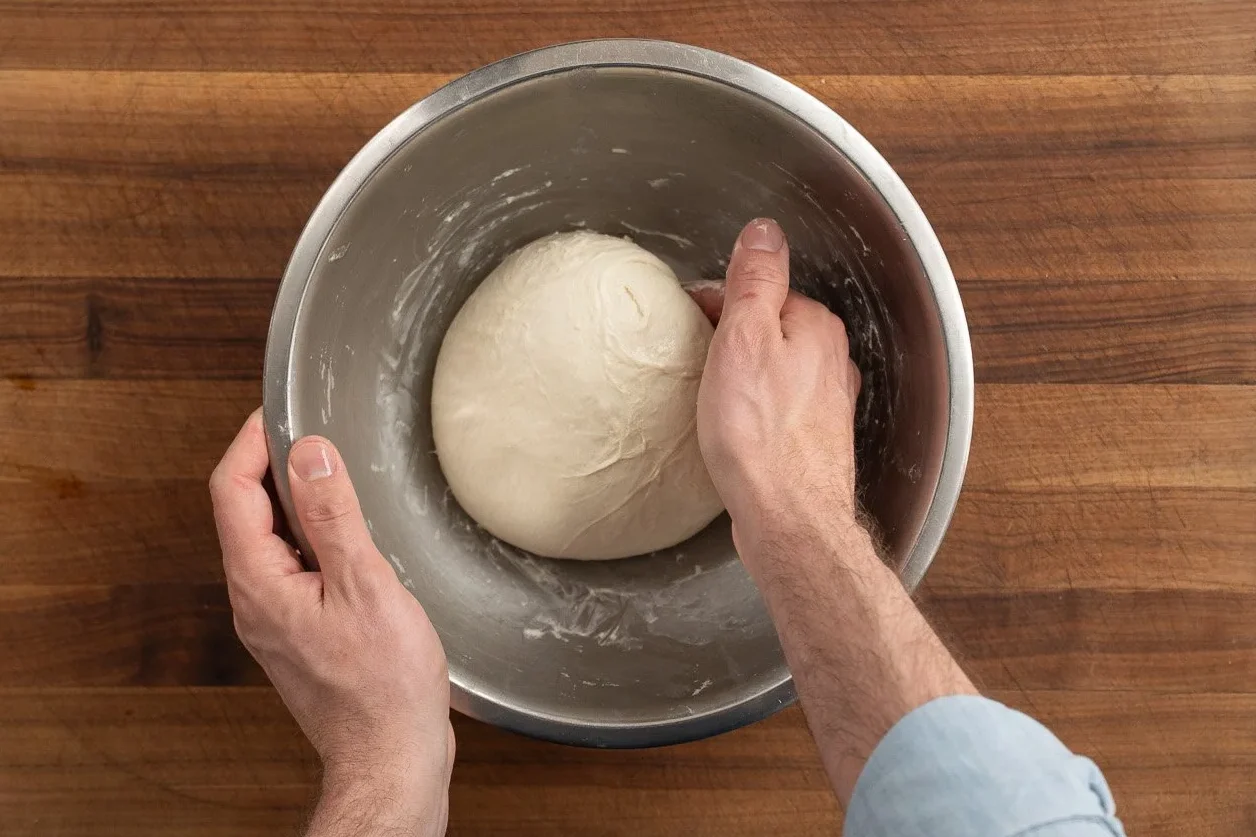
6. Repeat this fold 4-5 more times around the bowl until you have a dough ball that’s tucked into a little package. Flip the dough over onto the folded seams and round off the dough ball by tucking the dough under itself as you rotate it from 10 o’clock to 2 o’clock to create surface tension. Watch my recipe video (in the recipe card below) for a live demonstration of how I do this.
7. Cover the bowl and rest 30 more minutes.
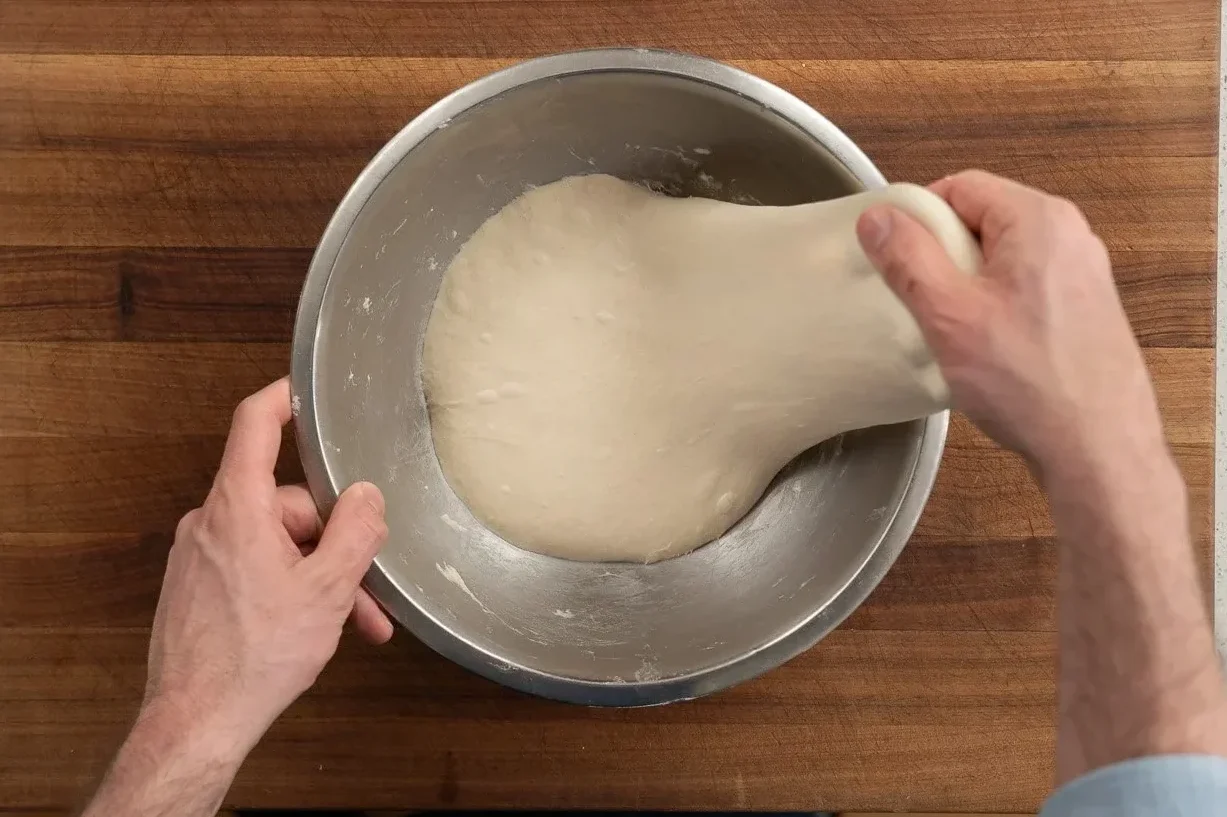
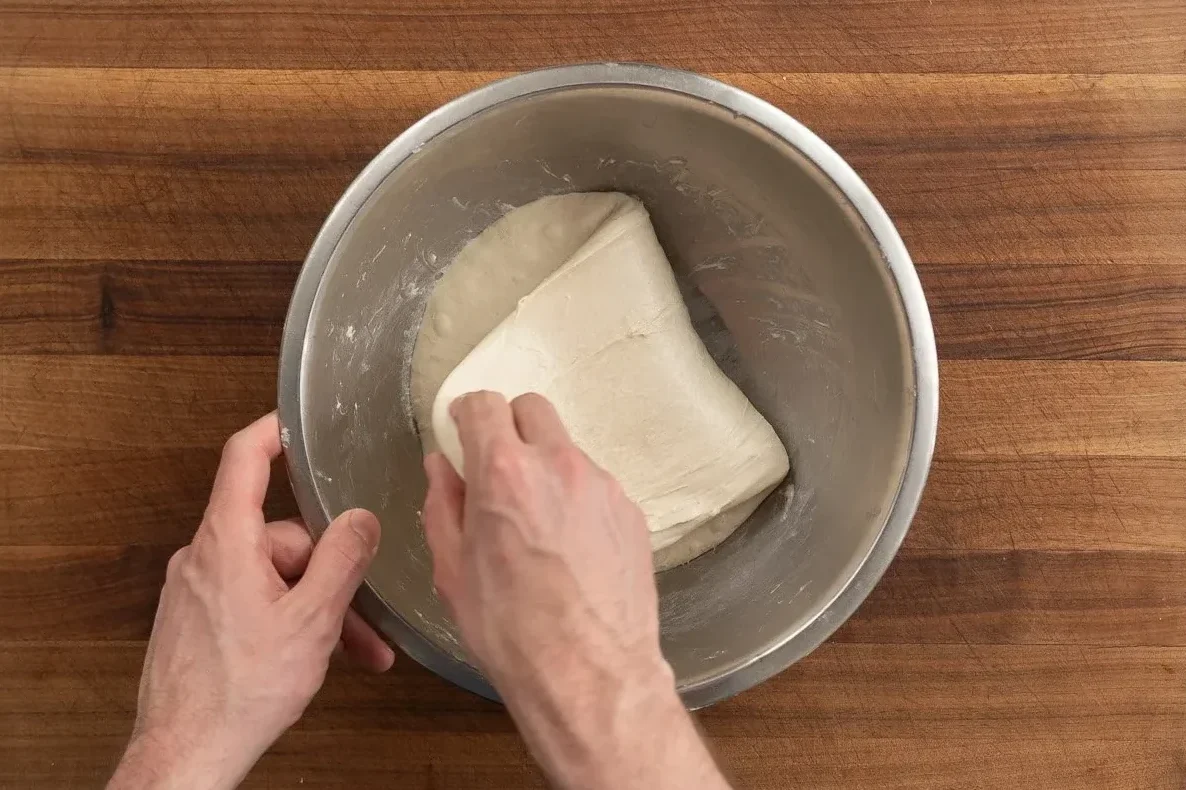
8. 30 Minutes later (or 60 Minutes after finishing the mix), complete a second strength-building fold. Same as before: grab a section on the side of the dough, stretch it up, fold over to the other side, rotate the bowl and repeat 4-5 times. You’ll then round the dough again using a 10 to 2 o’clock tucking motion to create surface tension until the dough is a nice, tight ball
9. Cover the bowl and transfer to the fridge for 4-24 hours.
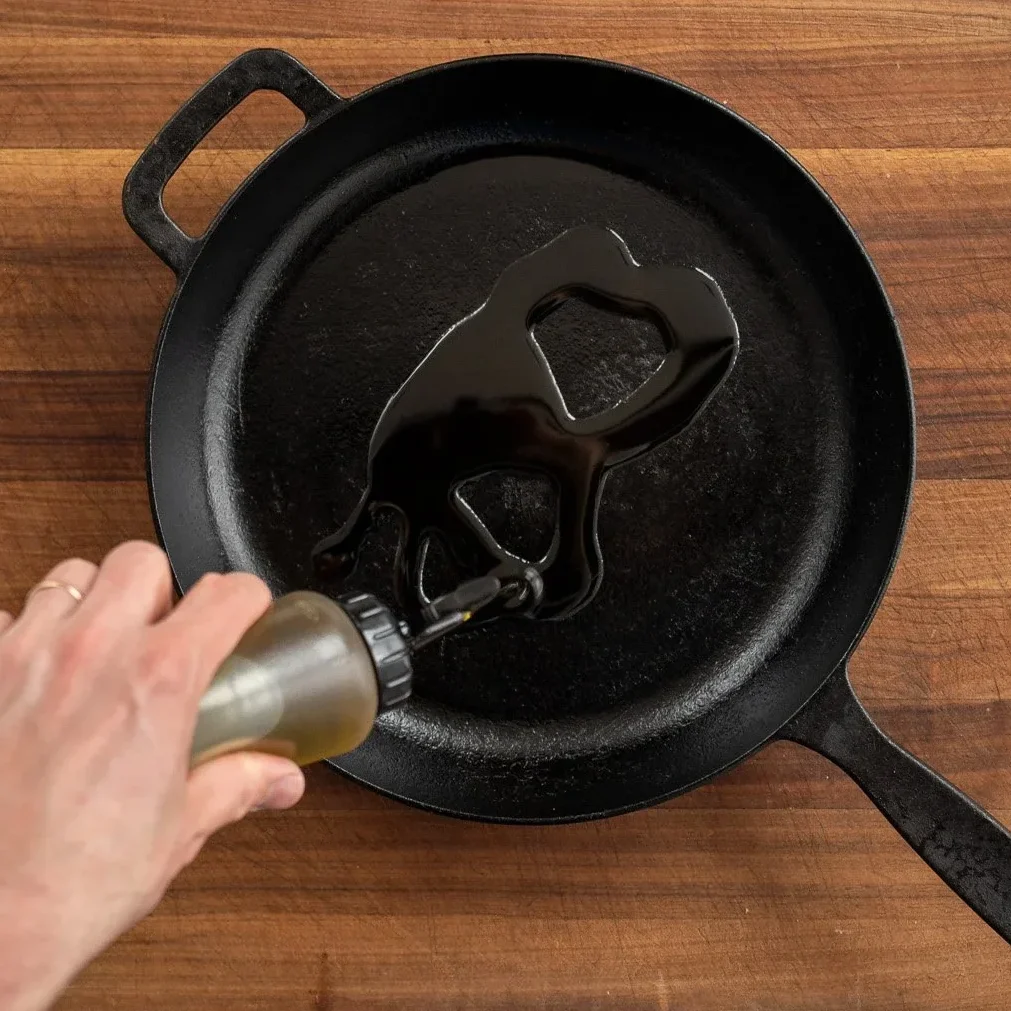
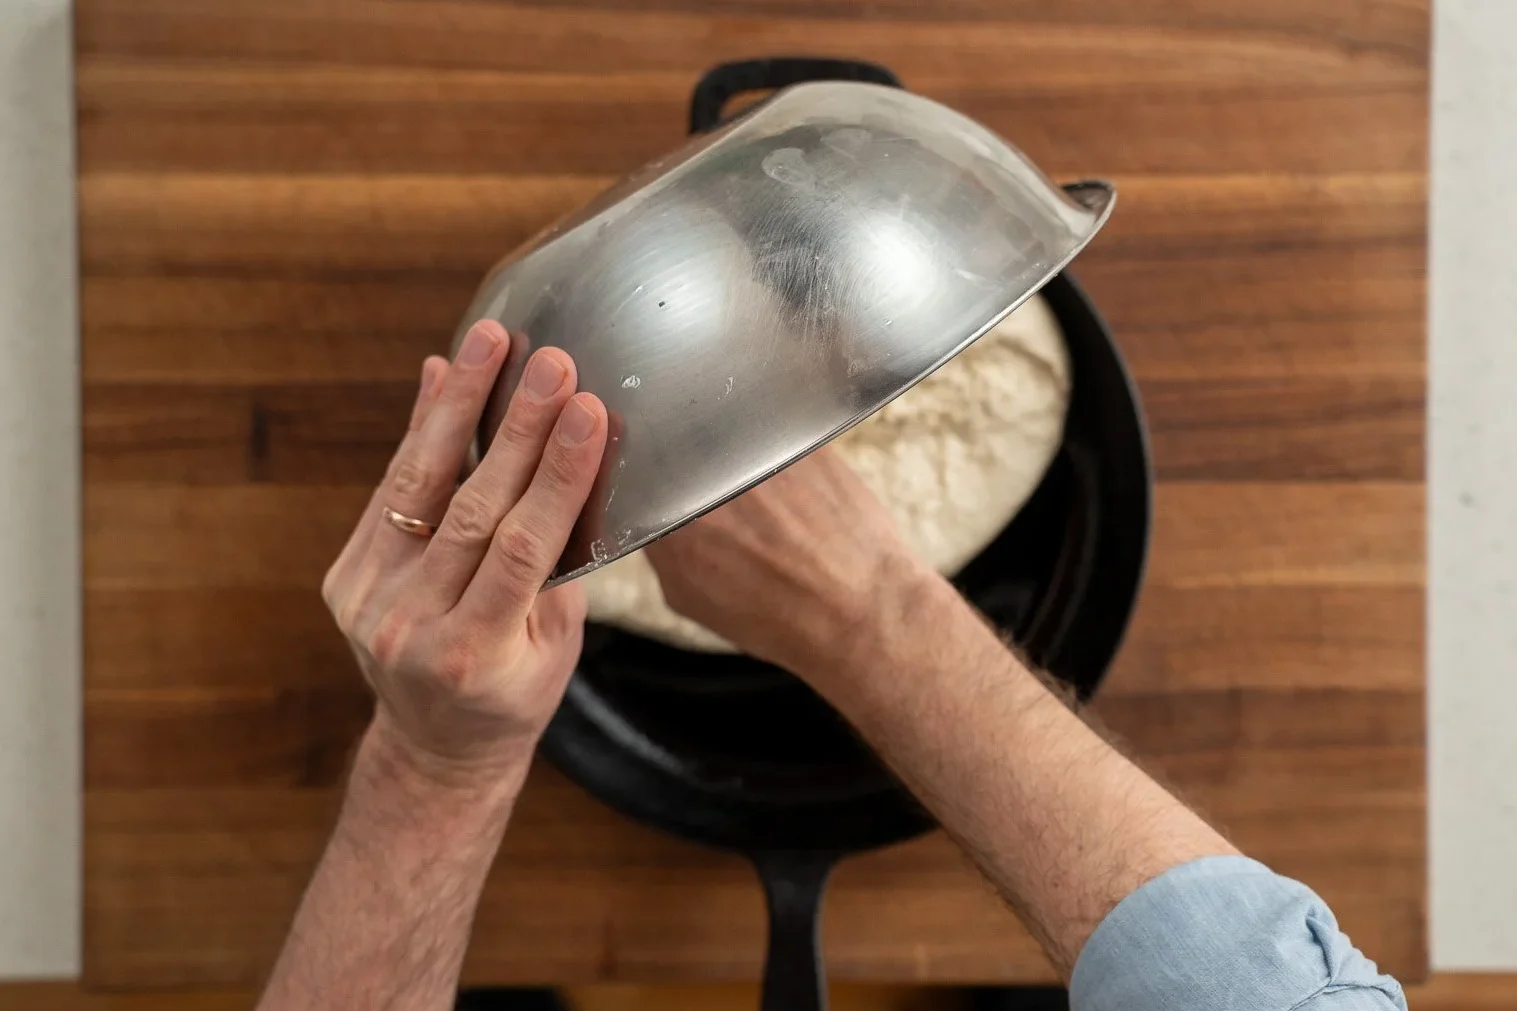
10. Pour about ¼ cup olive oil into a 12-inch cast iron skillet and then transfer the cold dough into the oiled pan. When placing the dough in the pan, the bottom side that was touching the bowl should now be facing up in the cast iron pan.
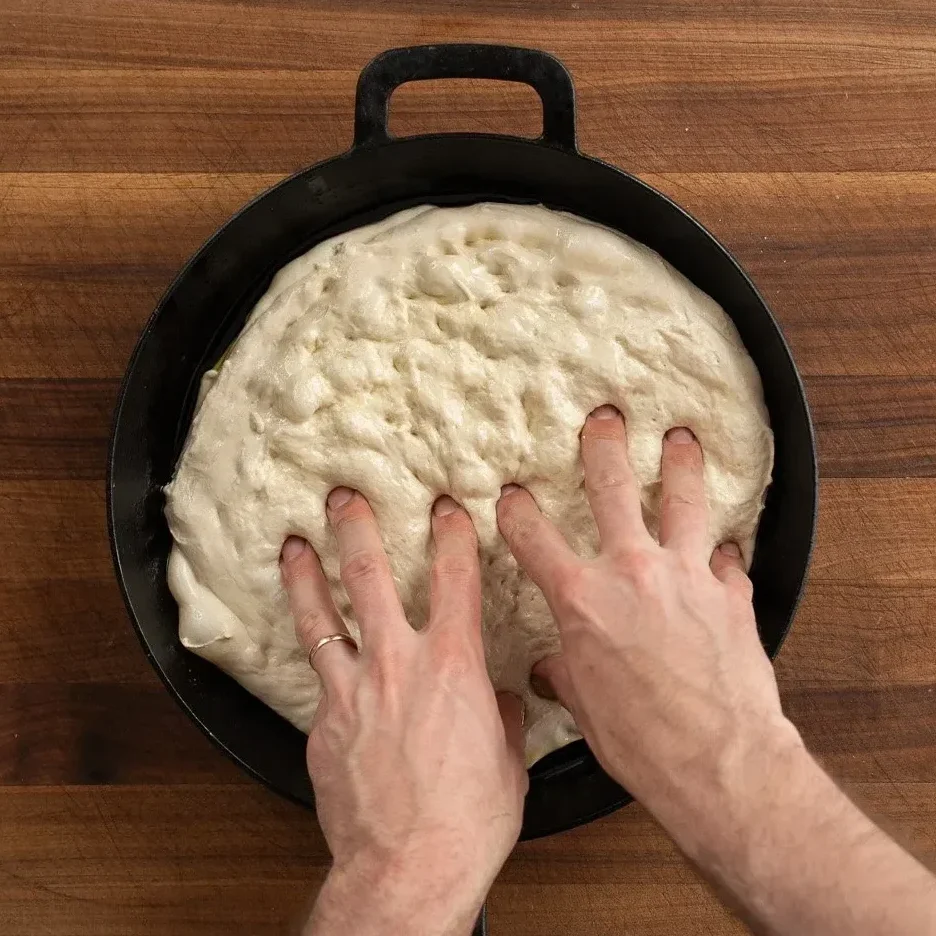
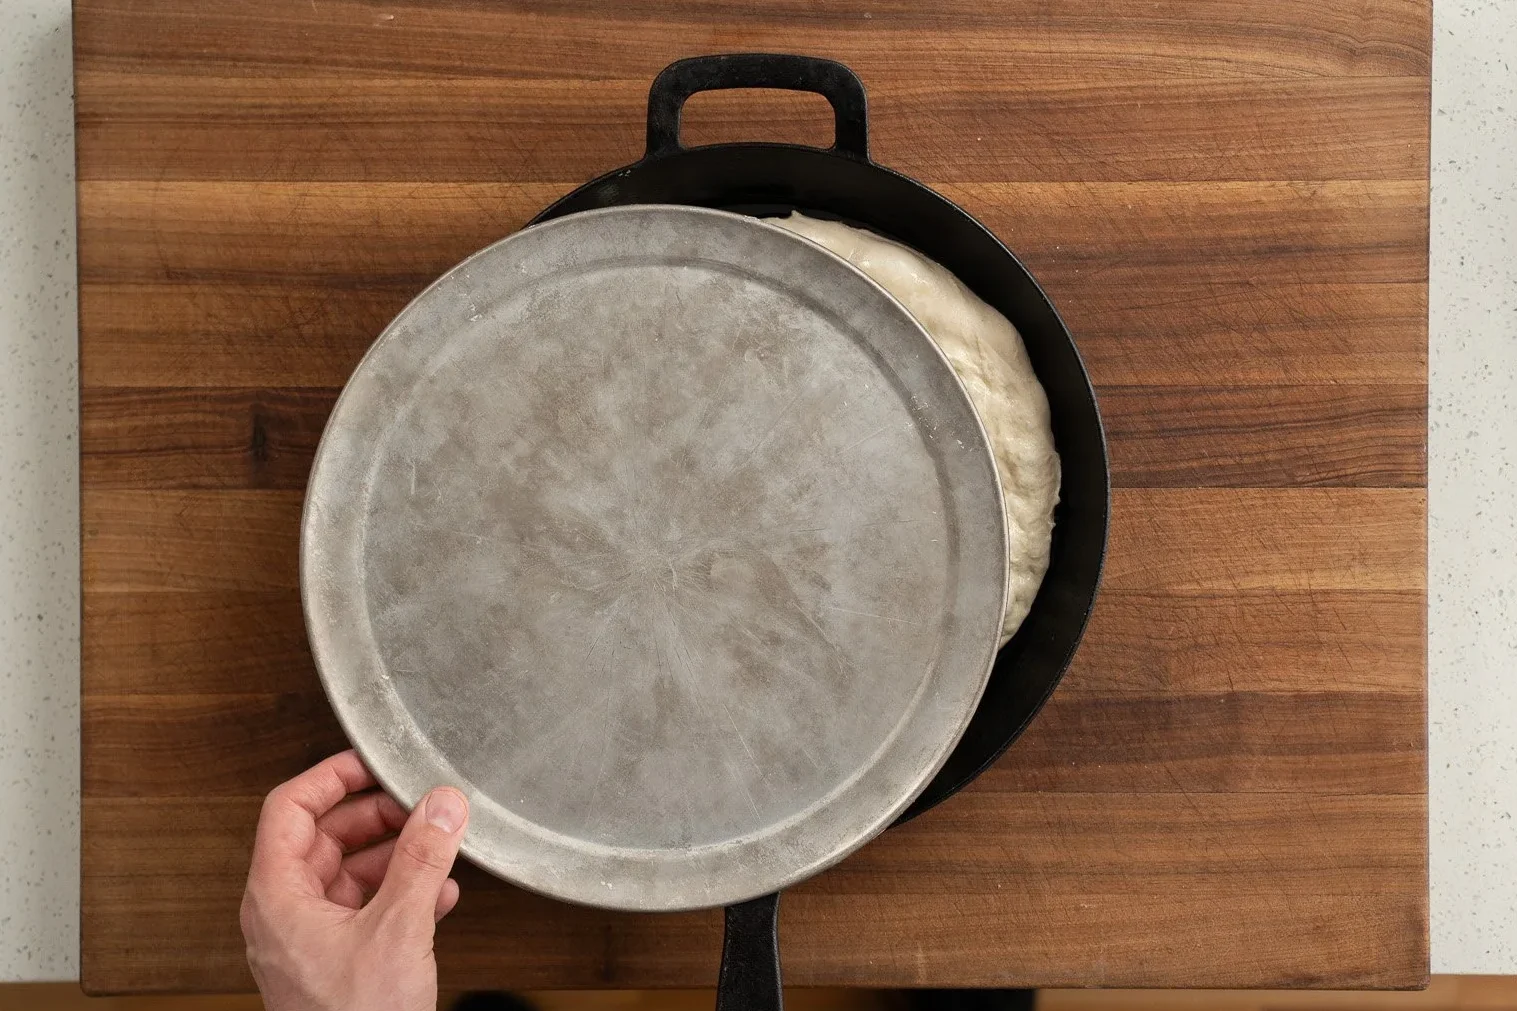
11. Using oiled fingertips, dimple and gently stretch the dough out toward the edges of the pan. Don’t force it. If it springs back, let it relax for a few minutes and try again. Cover and place in a warm spot (ideally above 70°F/21°C) to proof for roughly 60 minutes.
Tip: If your house is cold, preheat your oven to 500°F / 260°C early and put the cast iron on the stovetop to enjoy the toasty micro climate around the oven.
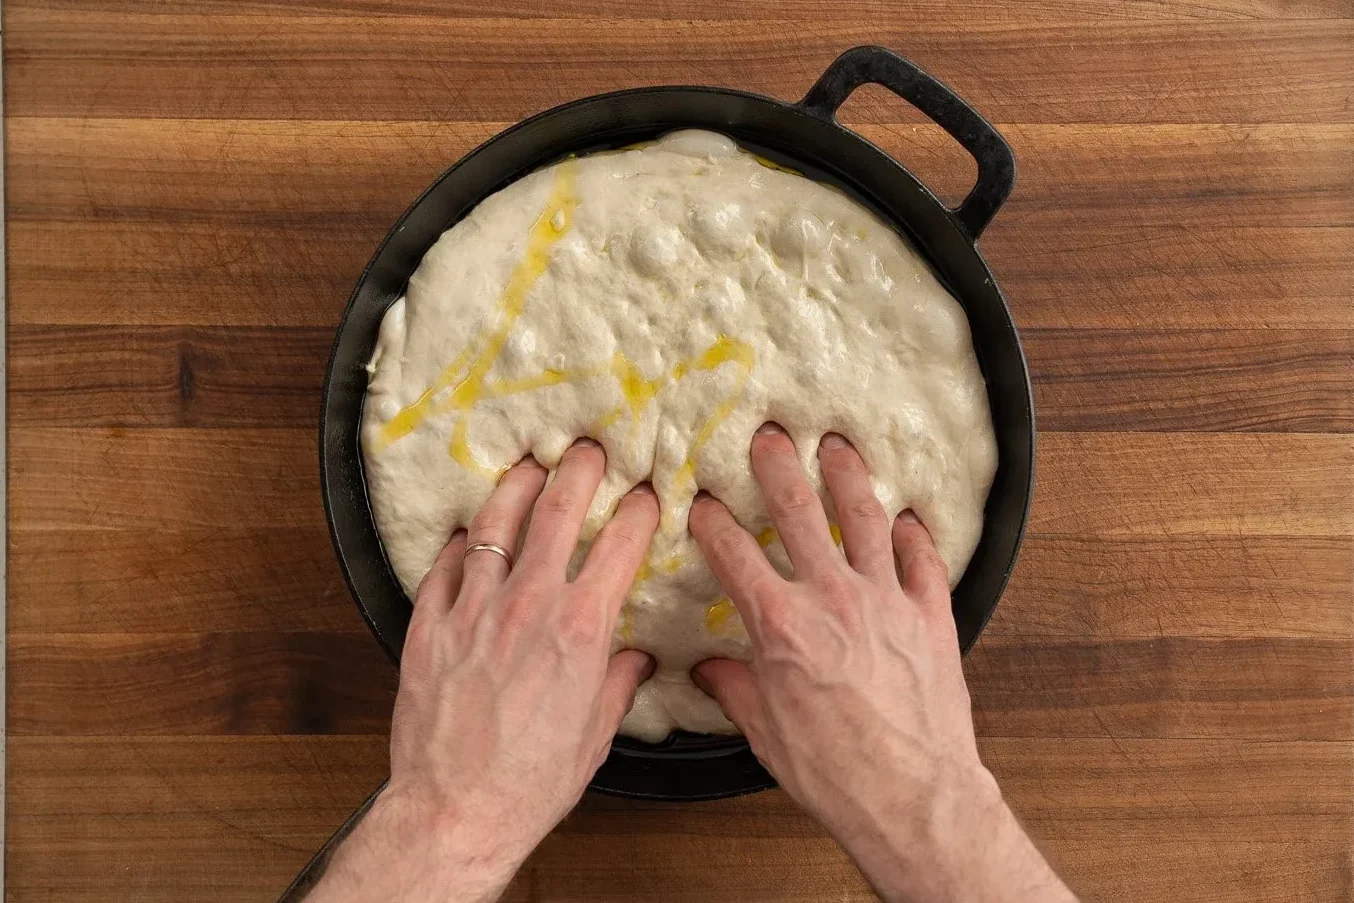
12. 60 minutes later, drizzle the top of the dough with a touch more olive oil, then dimple the dough again with your fingertips 10-12 times, pressing all the way to the bottom of the pan.
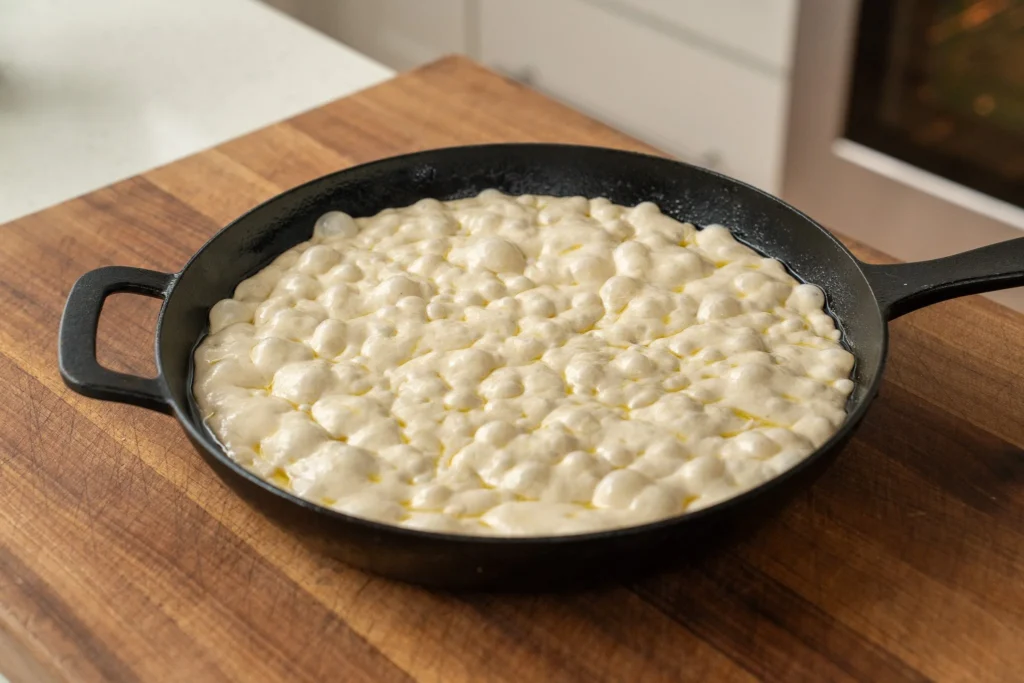
13. Cover and let proof for about 30 more minutes or until the dough has doubled from its original size and looks jiggly, buoyant, and is full of air bubbles.
14. Preheat your oven to 500°F/260°C if you haven’t already.
15. Sprinkle the top of the dough liberally with flaky salt.
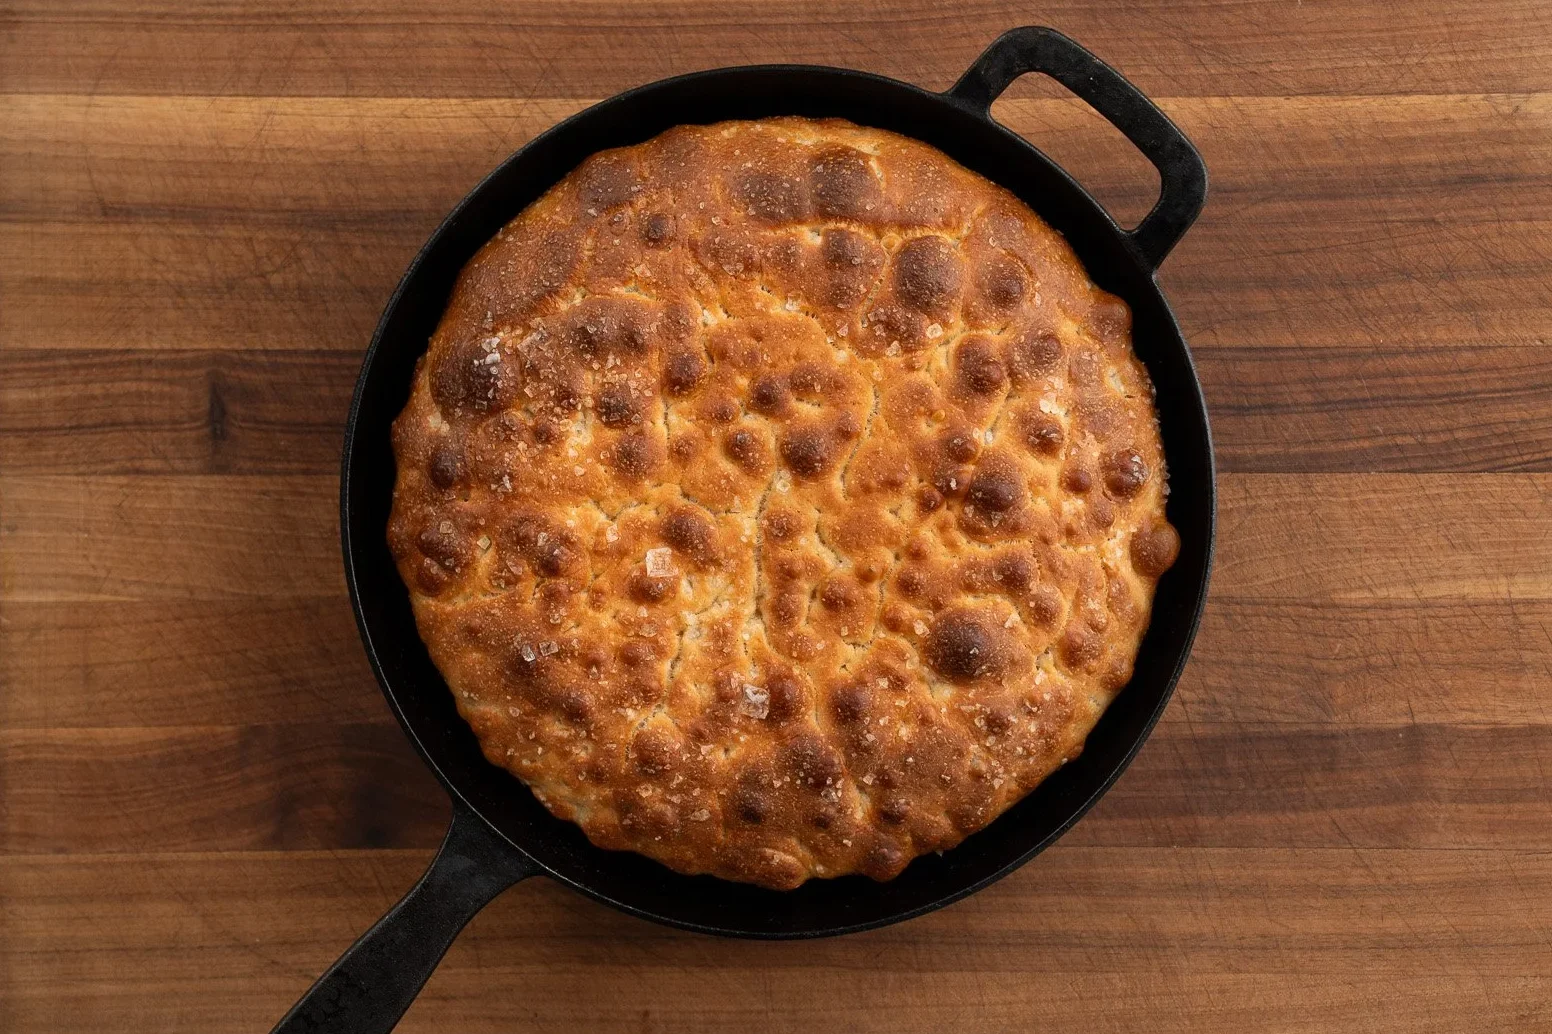
16. Bake for 15-18 minutes until the top is deeply golden brown on top and fully risen. Bake it darker than you think. One of the main benefits of the longer overnight fermentation is the deep complexity of flavor you get from browning the crust hard. Same day short ferments lack this depth.
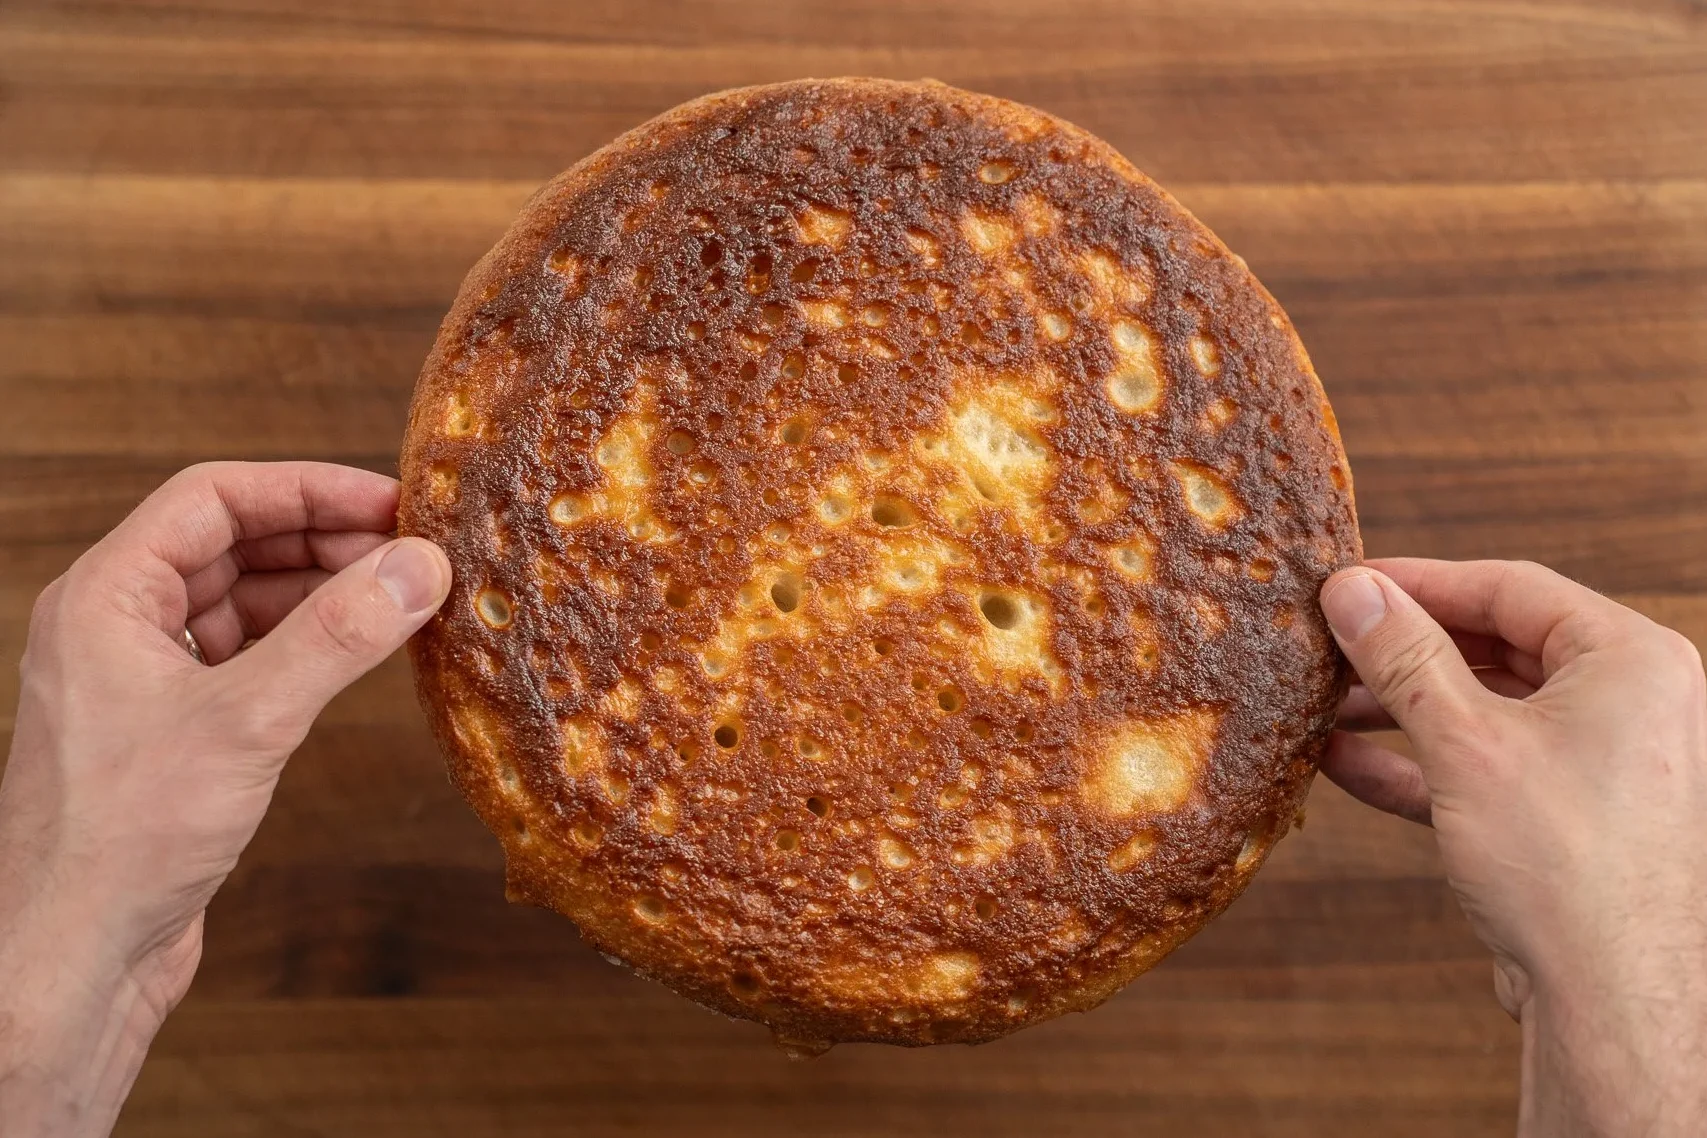
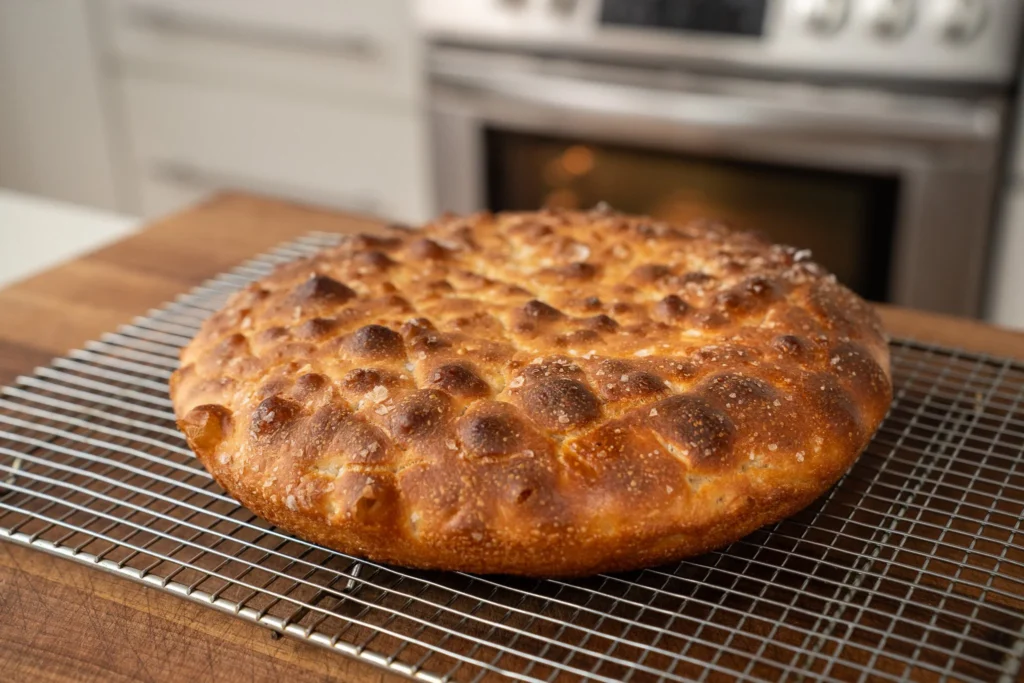
17. Immediately remove the focaccia from the pan and place on a cooling rack. Let it rest for at least 15-20 minutes before cutting. (If you cut in too early, steam escapes and the inside could be gummy)
Pin this now to find it later
Pin ItTOPPING IDEAS
Focaccia is a blank canvas of a bread. Here are the best focaccia toppings in my opinion:
- Fresh Rosemary
- Cherry Tomatoes
- Castelvetrano Olives
- Roasted Garlic
- Everything Bagel Seasoning
HOW TO USE THIS BREAD
This focaccia makes the ultimate sandwich bread. The olive oil-fried crust holds up to anything you throw at it. It’s also incredible dipped in balsamic and olive oil, used as a base for bruschetta, or just eaten warm, standing over the sink, straight out of the oven like the pig that you are.
Storage and Make-Ahead
After Baking: Focaccia keeps well wrapped tightly in plastic wrap or in a sealed bag at room temp for up to 2 days. It’s best fresh, obviously, but it reheats well in the oven
Reheat: Bake slices in a 375°F (190°C) oven for 5-7 minutes to re-crisp the crust — the microwave will make it chewy and sad, so skip that.
Freeze: Wrap the cooled focaccia tightly in plastic then foil, and it’ll keep for about 3 months in the freezer. Thaw at room temp, then reheat in 400°F (200°C) oven for 6-8 minutes or until crust is crisp again.
Make-ahead: The cold ferment is the make-ahead. Mix the dough the night before and it will be ready to bake whenever you are. 24 hours is my preference, but dough will stay lively enough in the fridge for up to 4 days. The longer it ferments, the more flavor it gets, but since fermentation times peak at about 48 hours, expect a decline in gluten strength. That just means lower rise, smaller bubbles.
Cast Iron Focaccia
Ingredients
- 360 g water, at 90°F/30°C — for dough mix
- 10 g sugar
- 25 g olive oil — plus extra for the pan and drizzling
- 450 g bread flour, 12.7% protein
- 20 g water, to dissolve yeast
- 12 g salt
- 4 g instant yeast
- flaky salt for finishing, Maldon or similar
Instructions
- Measure 360g (1½ cups) warm water, sugar, olive oil, and bread flour into a medium bowl. Stir with a sturdy metal spoon until combined, then finish mixing with a wet hand. Cover and rest for 30 minutes.
- After 30 minutes, mix together 20g warm water, yeast, and salt in a small container
- Add the yeast-salt slurry to the dough then wet your hand and use a claw-like squeezing maneuver to mix until the salt and yeast are well combined with the hydrated flour and there are no large clumps, about a minute.
- Cover and ferment at room temperature for 30 minutes.
- 30 minutes later, perform a strength-building fold. To do that, grab a section on one side of the dough and stretch it up until you meet resistance. Fold that stretched portion of dough across to the other side of the bowl.
- Repeat this fold 4-5 more times around the bowl until you have a dough ball that's tucked into a little package.
- Flip the dough over onto the folded seams and round off the dough ball by tucking the dough under itself as you rotate it from 10 o'clock to 2 o'clock to create surface tension.
- Cover the bowl and rest 30 more minutes.
- 30 Minutes later (or 60 Minutes after finishing the mix), complete a second strength-building fold. Same as before: grab a section on the side of the dough, stretch it up, fold over to the other side, rotate the bowl and repeat 4-5 times. You'll then round the dough again using a 10 to 2 o'clock tucking motion to create surface tension until the dough is a nice, tight ball
- Cover the bowl and transfer to the fridge for 4-24 hours.
- Pour about ¼ cup olive oil into a 12-inch cast iron skillet and then transfer the cold dough into the oiled pan, bottom side up.
- Using oiled fingertips, dimple and gently stretch the dough out toward the edges of the pan. Don't force it. If it springs back, let it relax for a few minutes and try again.
- Cover and place in a warm spot (ideally above 70°F/20°C) to proof for roughly 60 minutes.
- 60 minutes later, drizzle the top of the dough with a touch more olive oil, then dimple the dough again with your fingertips 10-12 times, pressing all the way to the bottom of the pan.
- Cover and proof for 30 more minutes or until the dough has doubled in size and looks buoyant full of air bubbles.
- Preheat your oven to 500°F/260°C if you haven't already.
- Sprinkle the top of the dough with flaky salt.
- Bake for 15-18 minutes until the top is deeply golden brown on top and fully risen.
- Immediately remove the focaccia from the pan and place on a cooling rack. to rest for at 15-20 minutes before cutting.
 Like this? Leave a comment below!
My Go-to Gear For This Recipe
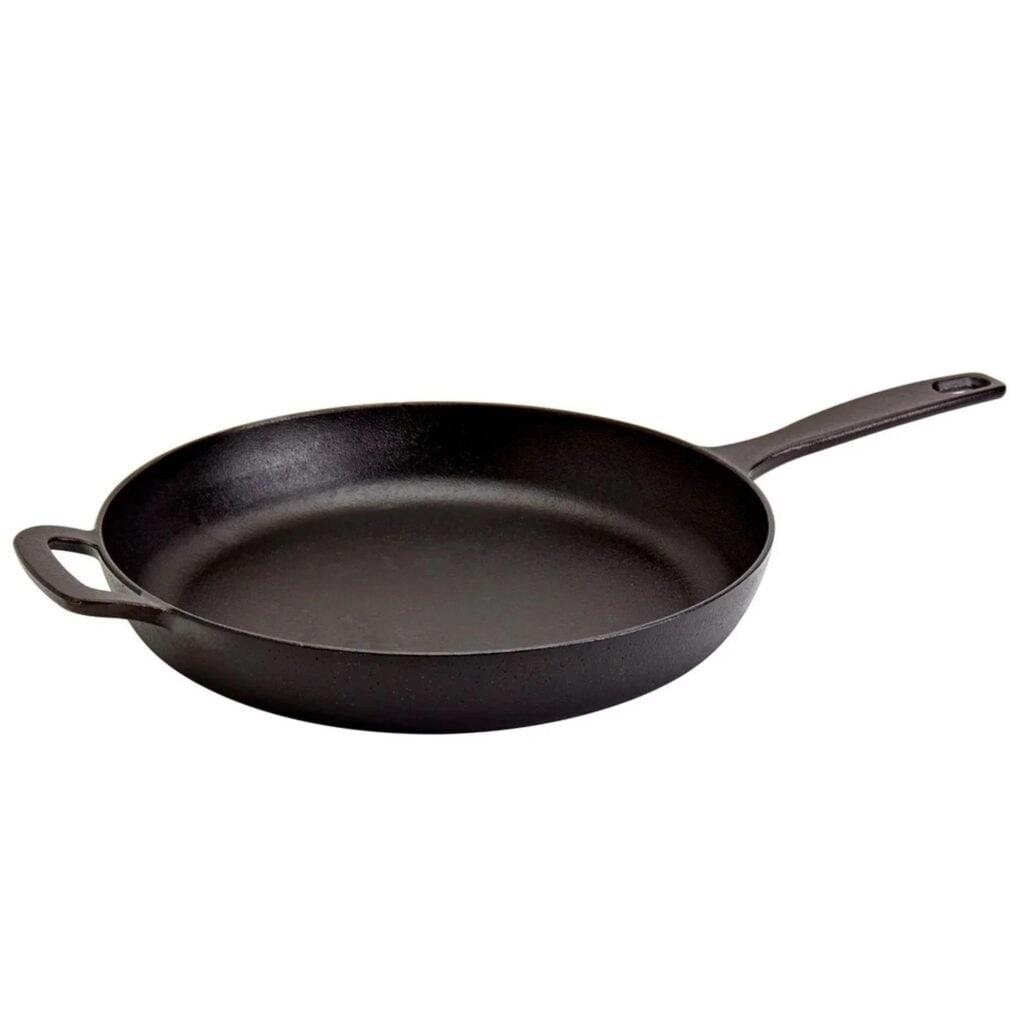
The cast iron I use in this video is a pre-seasoned 12” that I got from Kohl’s years ago (link here). I know that Lodge is the gold-standard, but I really like this one for the long handle.
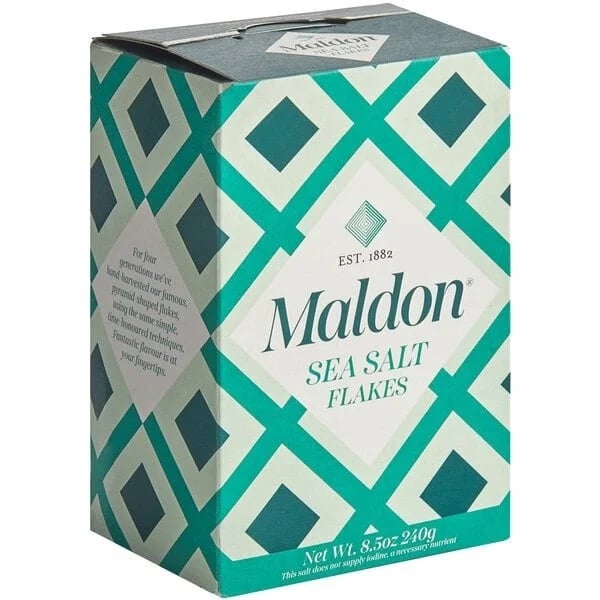
I also always reach for Maldon brand flaky sea salt for finishing. Its flakes are huge, the price is reasonable, and a little lasts me a long time.
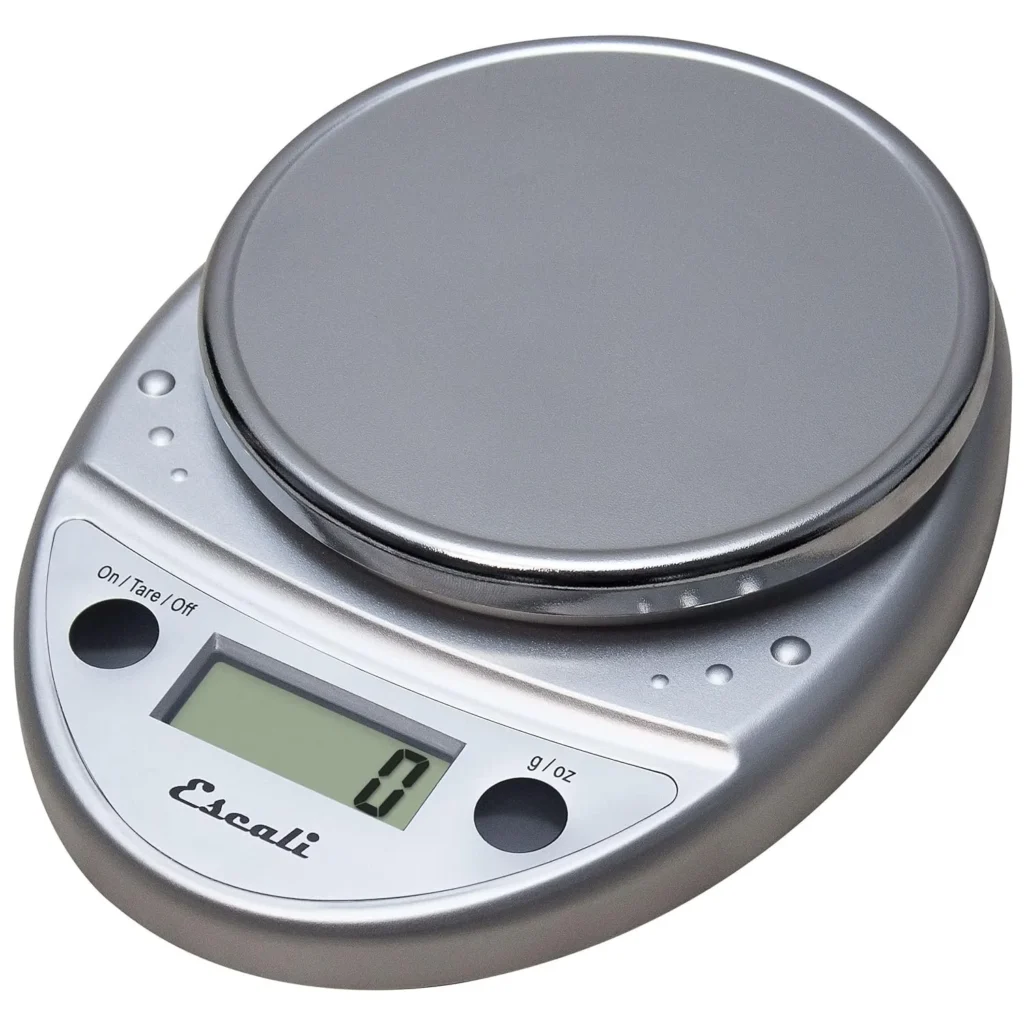
Saying it again for the people in the back: weighing your ingredients (especially when baking) is the best and most accurate way to a great result.
FREQUENTLY ASKED QUESTIONS
Yes — a cake pan or small rimmed baking sheet with high sides will work. You need something that can contain the pool of olive oil.For cake pan, keep recipe size the same, for half sheet tray, scale the recipe numbers up by 1.5x. You need something that can contain the pool of olive oil. That said, cast iron holds massive heat and essentially fries the bottom of the dough, giving you that ultimate focaccia crunch. It’s worth picking one up if you don’t have one.
You can let the dough rise at room temperature until doubled, about 1.5-2 hours, and skip the fridge entirely. You’ll still get good focaccia — but you’ll sacrifice the deep, complex, bakery-style flavor that only time in the fridge can develop. The overnight rest also produces better bubbles and a more digestible crumb.
No. Olive oil isn’t just preventing sticking — it’s an ingredient. You need a pool of oil to actually fry the bottom crust. That’s what creates the iconic golden, crunchy texture. Pan spray gives you zero of that. Don’t skimp here.
Yes, but since the wetness of this dough can be taxing ont he motor I’d mix on lowish speed. But honestly, one of the best things about this recipe is that you don’t need a mixer. There is no quality advantage to using a stand mixer. A spoon and a wet hand are all it takes.
No. I would not use convection even if your oven has it. The moving air dries out the top of the bread, which will inhibit its oven spring. Convection will also brown the top before the bottom is fried and the middle is cooked through
Never. Those big bubbles are the chef’s kiss of a good focaccia. They crisp up beautifully in the oven and are honestly one of the best bites. Leave them alone.